
Instructions for Colombia Immigration Forms - CheckMig
Before traveling to Colombia, all visitors must complete the Check-Mig registration—an online immigration form required by Migración Colombia. This process helps the authorities streamline border control and verify the details of arriving passengers. Completing it is mandatory, and airlines will often ask for proof before allowing you to board your flight.
To make your arrival smooth and stress-free, we’ve prepared a straightforward guide with everything you need:
When to complete the form
What information you’ll need
Step-by-step instructions
Tips to avoid common errors
What to screenshot or save for arrival
You’ll find the process simple, but it’s important to follow it carefully. This page will walk you through the entire Check-Mig submission so you can focus on the fun part—getting ready to fly in Colombia.
What is Check-Mig?
Check-Mig is Colombia’s online immigration registration form. It’s used by Migración Colombia to pre-register your travel details and speed up immigration control when you arrive or depart.
You can only complete the form from 72 hours before your flight until 1 hour before departure.
Airlines and immigration officers may ask to see proof that you’ve completed Check-Mig before you board or when you land.
Important: Sometimes Migración Colombia shows a notice saying the online Check-Mig form is temporarily not required due to system upgrades. Even when that banner appears, some airlines still prefer or request that passengers complete the form when it’s available, so it’s best to follow the instructions we send you before your trip.
Before you start
Have the following handy:
Your passport
Your flight details (airline, flight number, origin city, travel date)
The address and contact details of where you will stay in Colombia
For Skyout tours, use the hosting details we send you in your welcome email.
A few minutes of uninterrupted time – the site can be a bit slow or “quirky,” so patience helps.
Step 1 – Open the Check-Mig form
Go to:
https://apps.migracioncolombia.gov.co/pre-registro/en/DatosViaje
You’ll see the first page asking about:
Whether you are entering or leaving Colombia
Your transport type (Air / Land / Maritime / Fluvial)
✅ For your arrival in Colombia, select the options that match “I travel to Colombia / Entrance to the country” and Air (for most international flights).
✅ Mark the options exactly as shown in the example screenshot

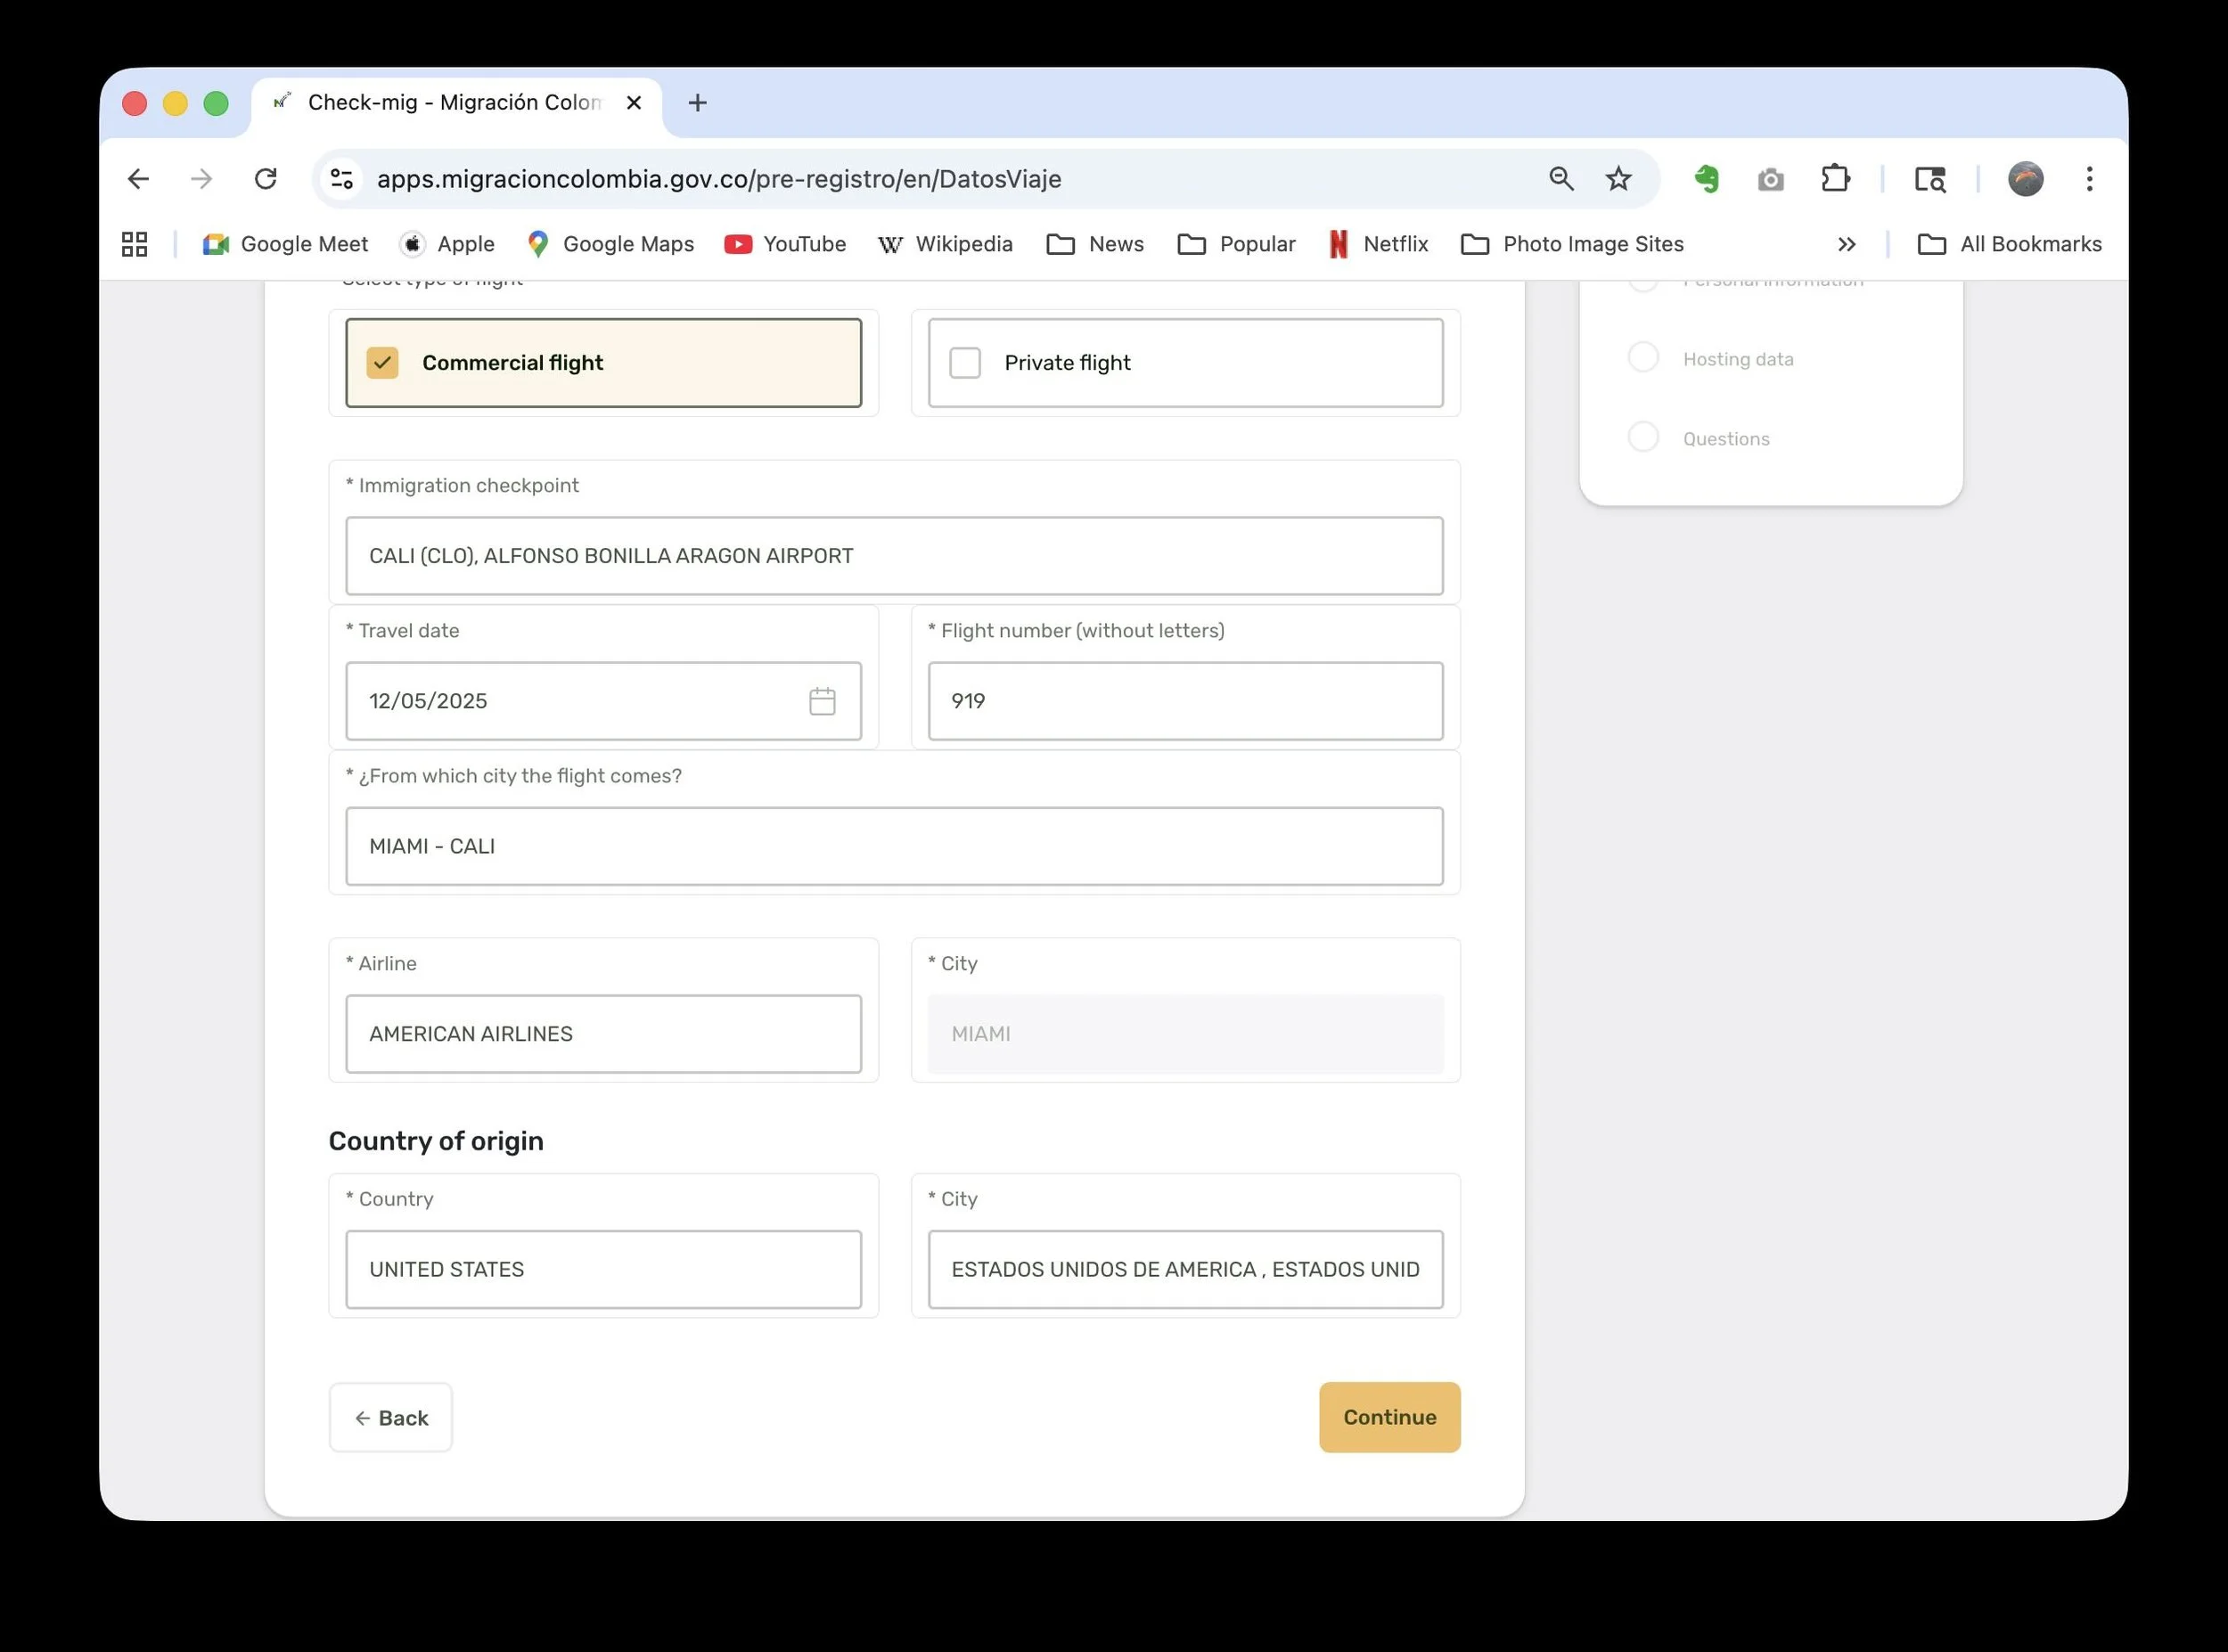
Step 2 – Travel information
On the next page, you’ll enter your flight details. The form will ask for things like:
Type of flight – choose Commercial flight
Immigration checkpoint – the Colombian airport where you arrive
Travel date – the date of your flight into Colombia
Flight number (without letters) – only enter the number portion of your flight (for example, if your flight is AA0050, enter 50, not AA0050).
City and country your flight is coming from
Airline – choose from the dropdown list
If the dropdowns feel slow or glitchy, that’s normal – just wait a few seconds and try again.
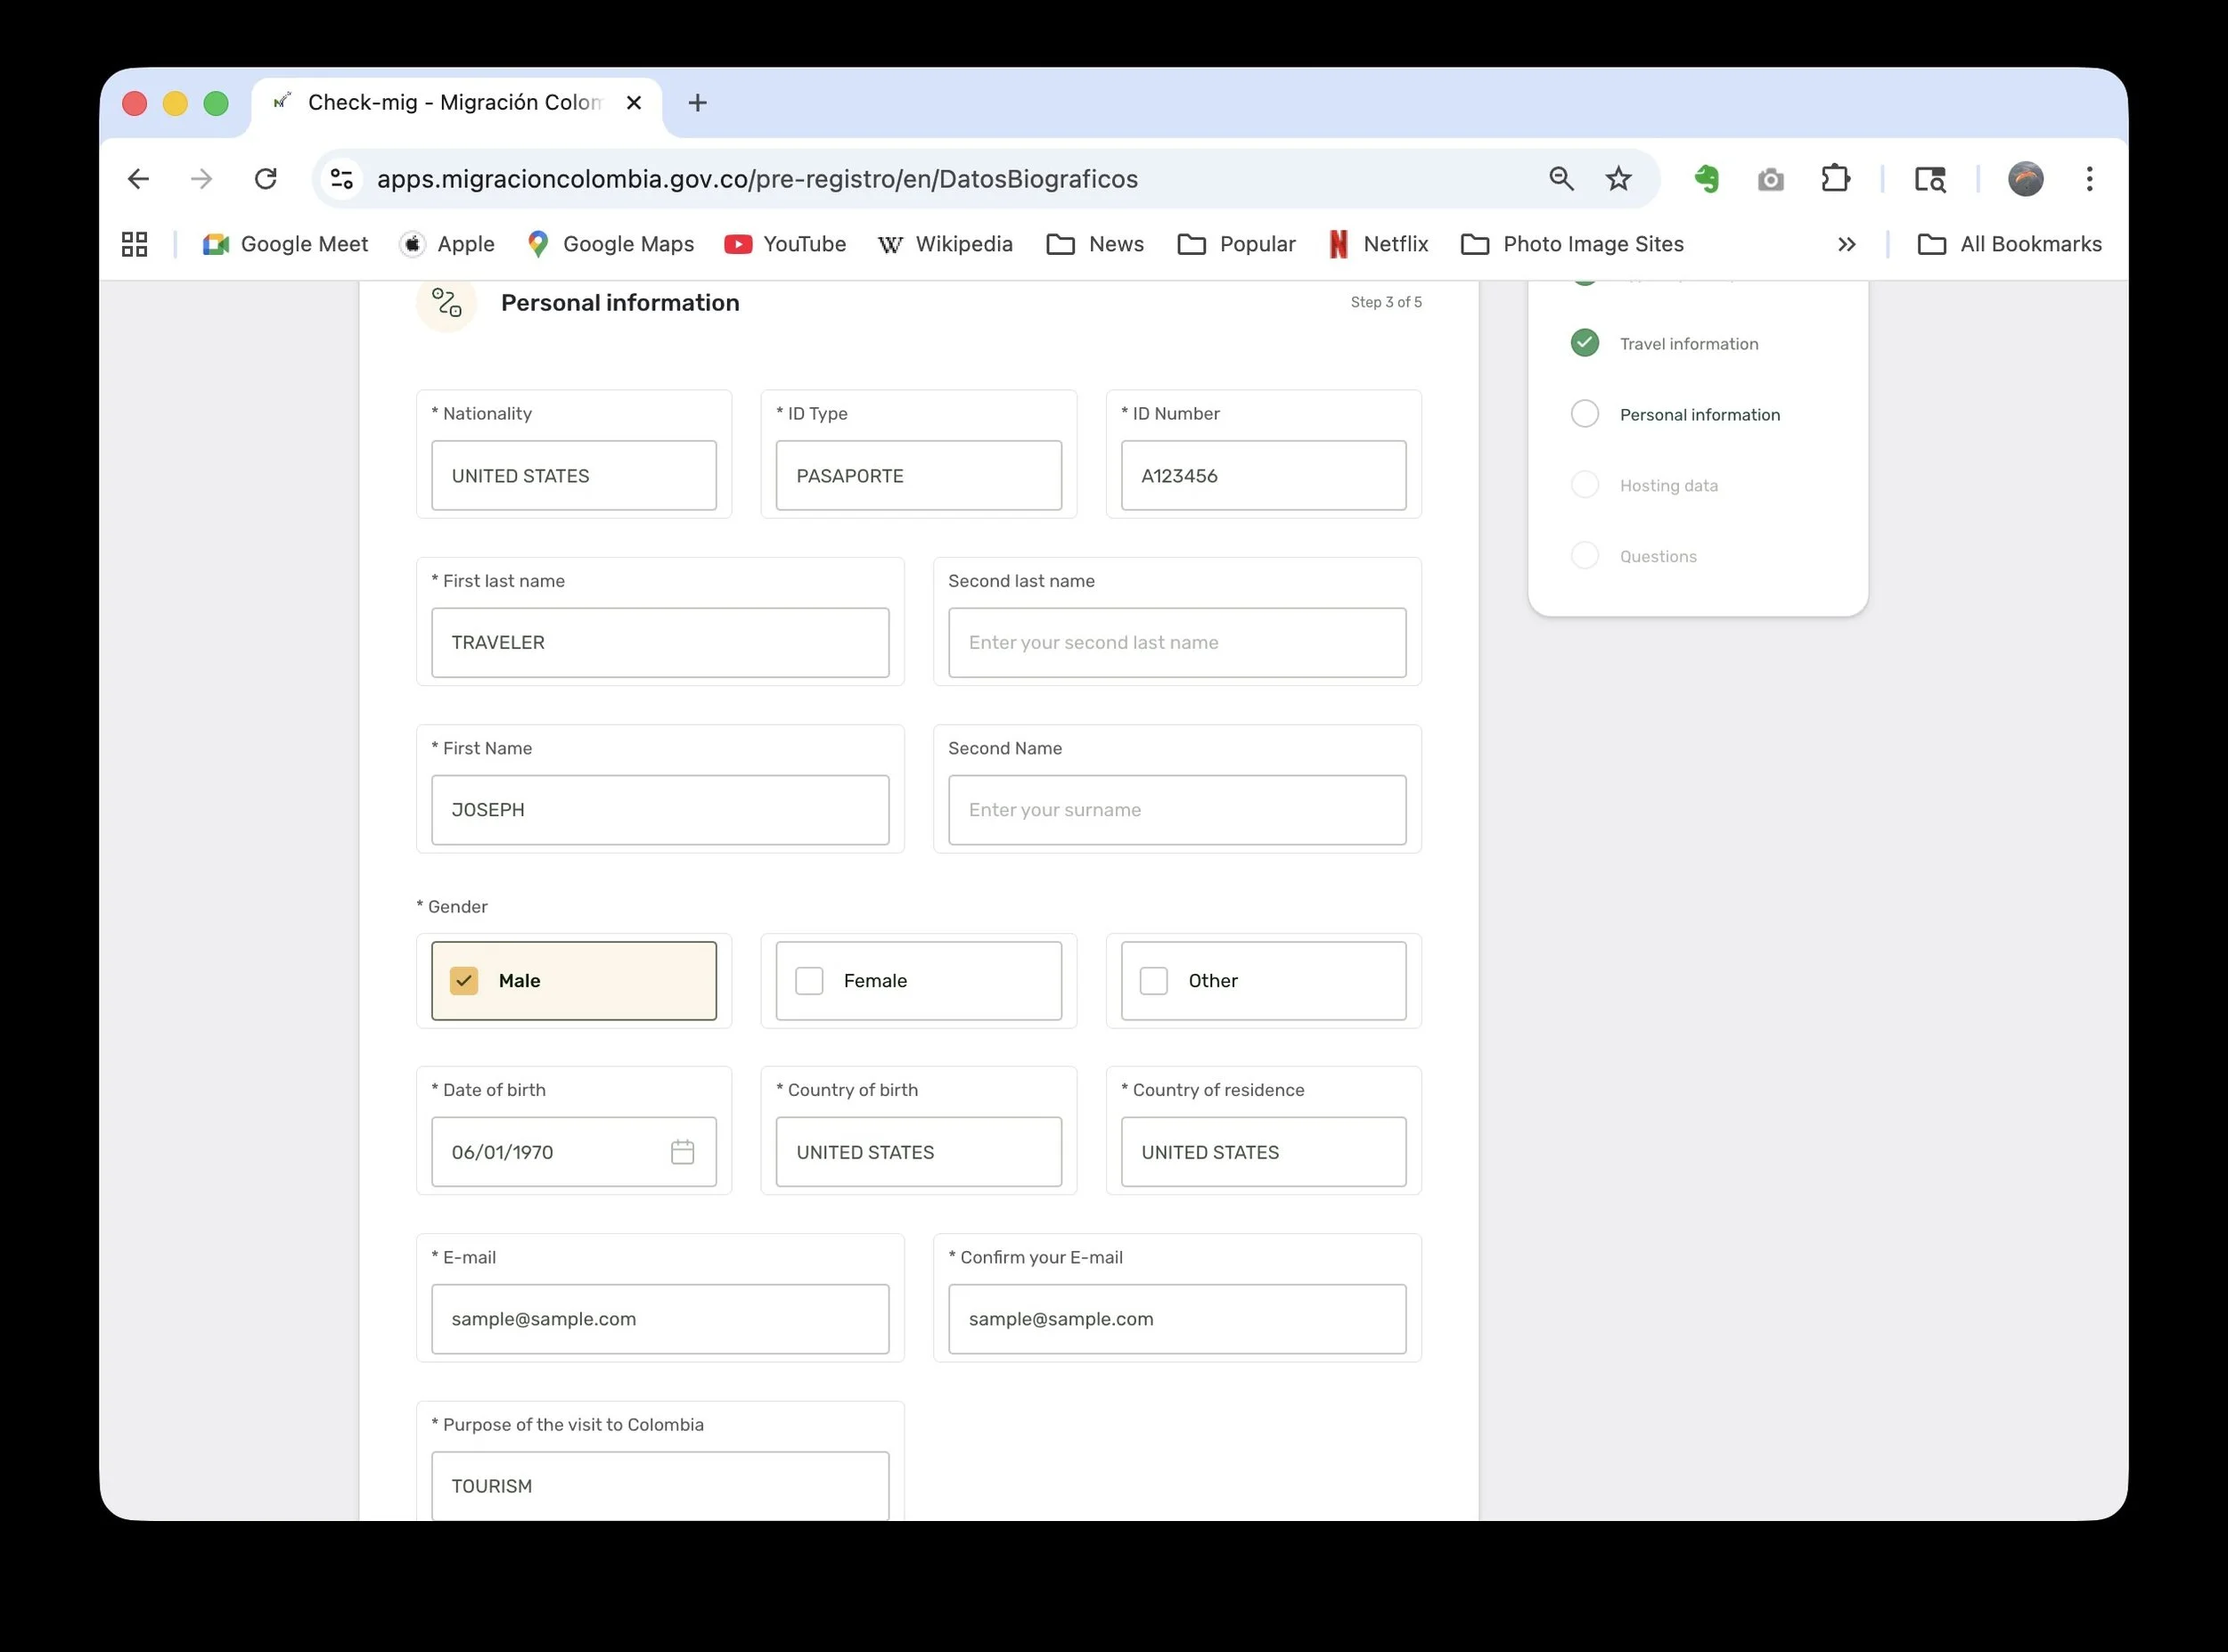
Step 3 – Personal information
Next is your personal information page. This should look similar to the example we’ve shared in the screenshots.
A few important notes:
The ID Type dropdown won’t populate until you first select your Nationality.
For ID Type, choose “Pasaporte”.
For ID Number, enter your passport number.
If you only have one last name, just enter that one (Latin American forms sometimes expect two surnames – for you, one is correct).
For Purpose of visit, choose “Tourism” from the dropdown.
Double-check spellings and numbers before moving on.
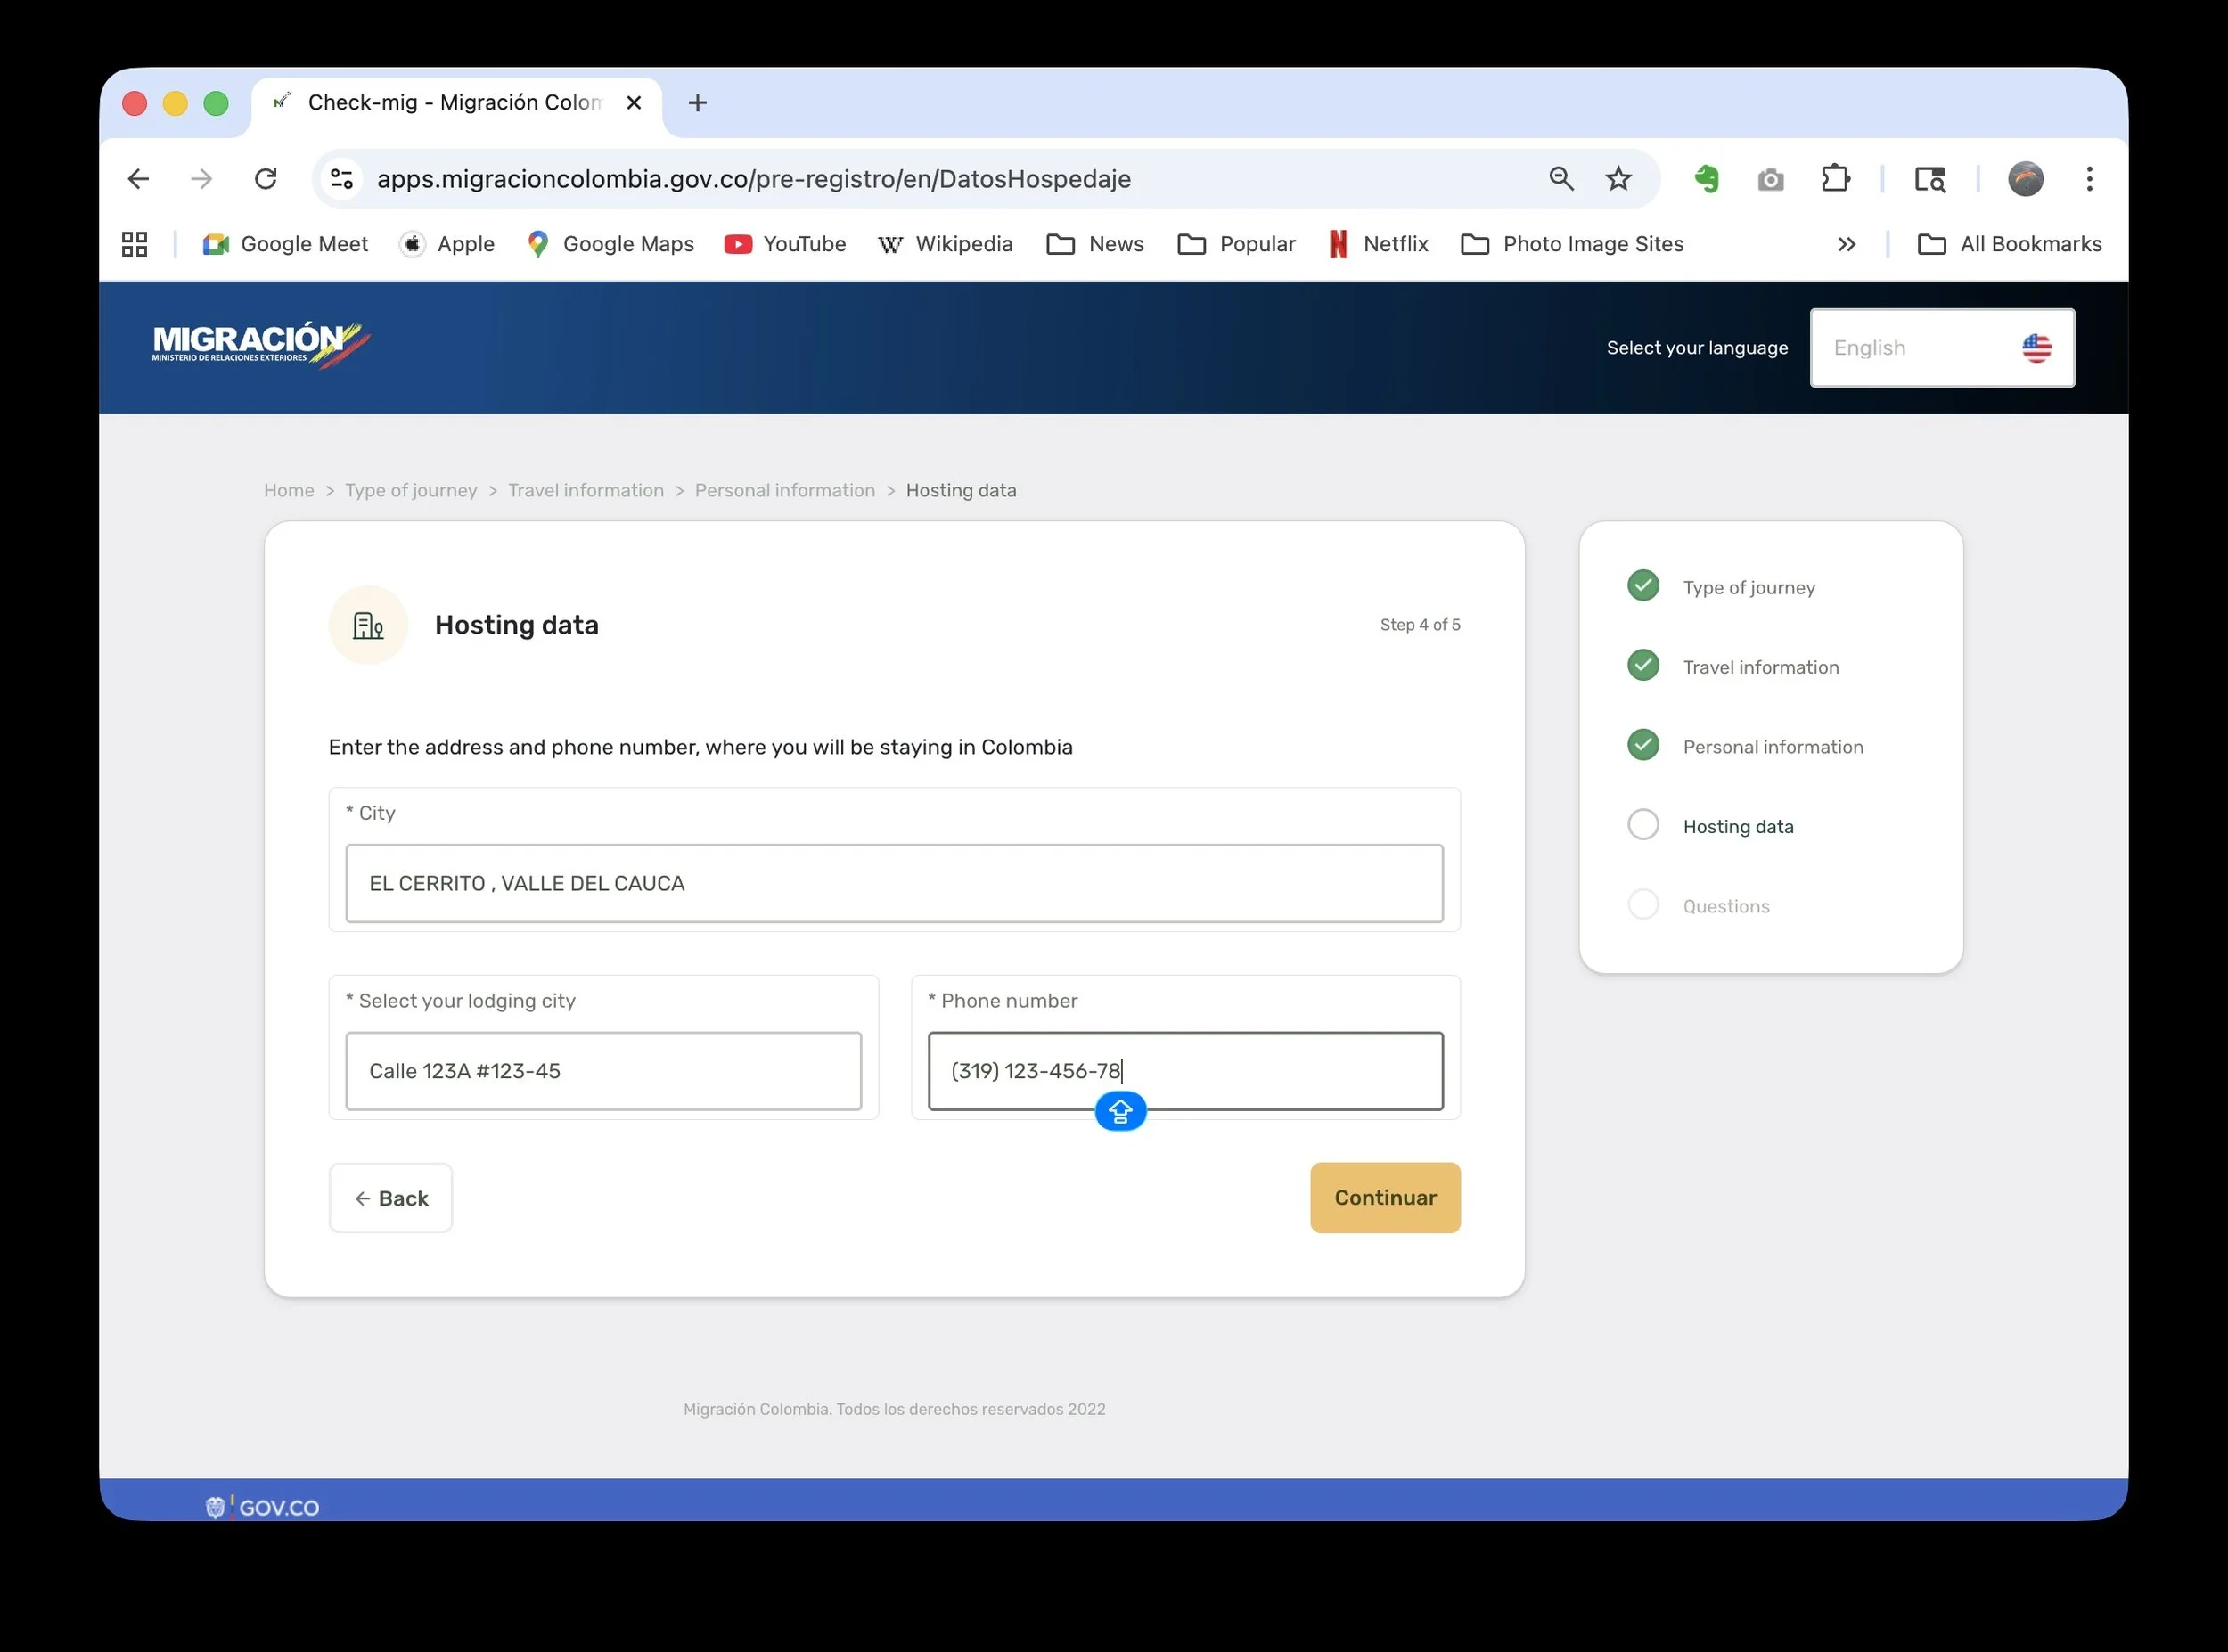
Step 4 – Hosting data (where you’ll stay)
Now you’ll enter your hosting information – basically where you’ll be staying in Colombia.
Use the contact name, address, and phone number we’ve provided in your Skyout welcome email.
The page can be a bit “squirrely,” so if the fields don’t respond immediately, wait a moment and try clicking again.
When you’re done, the page should match the example screenshot we sent you.
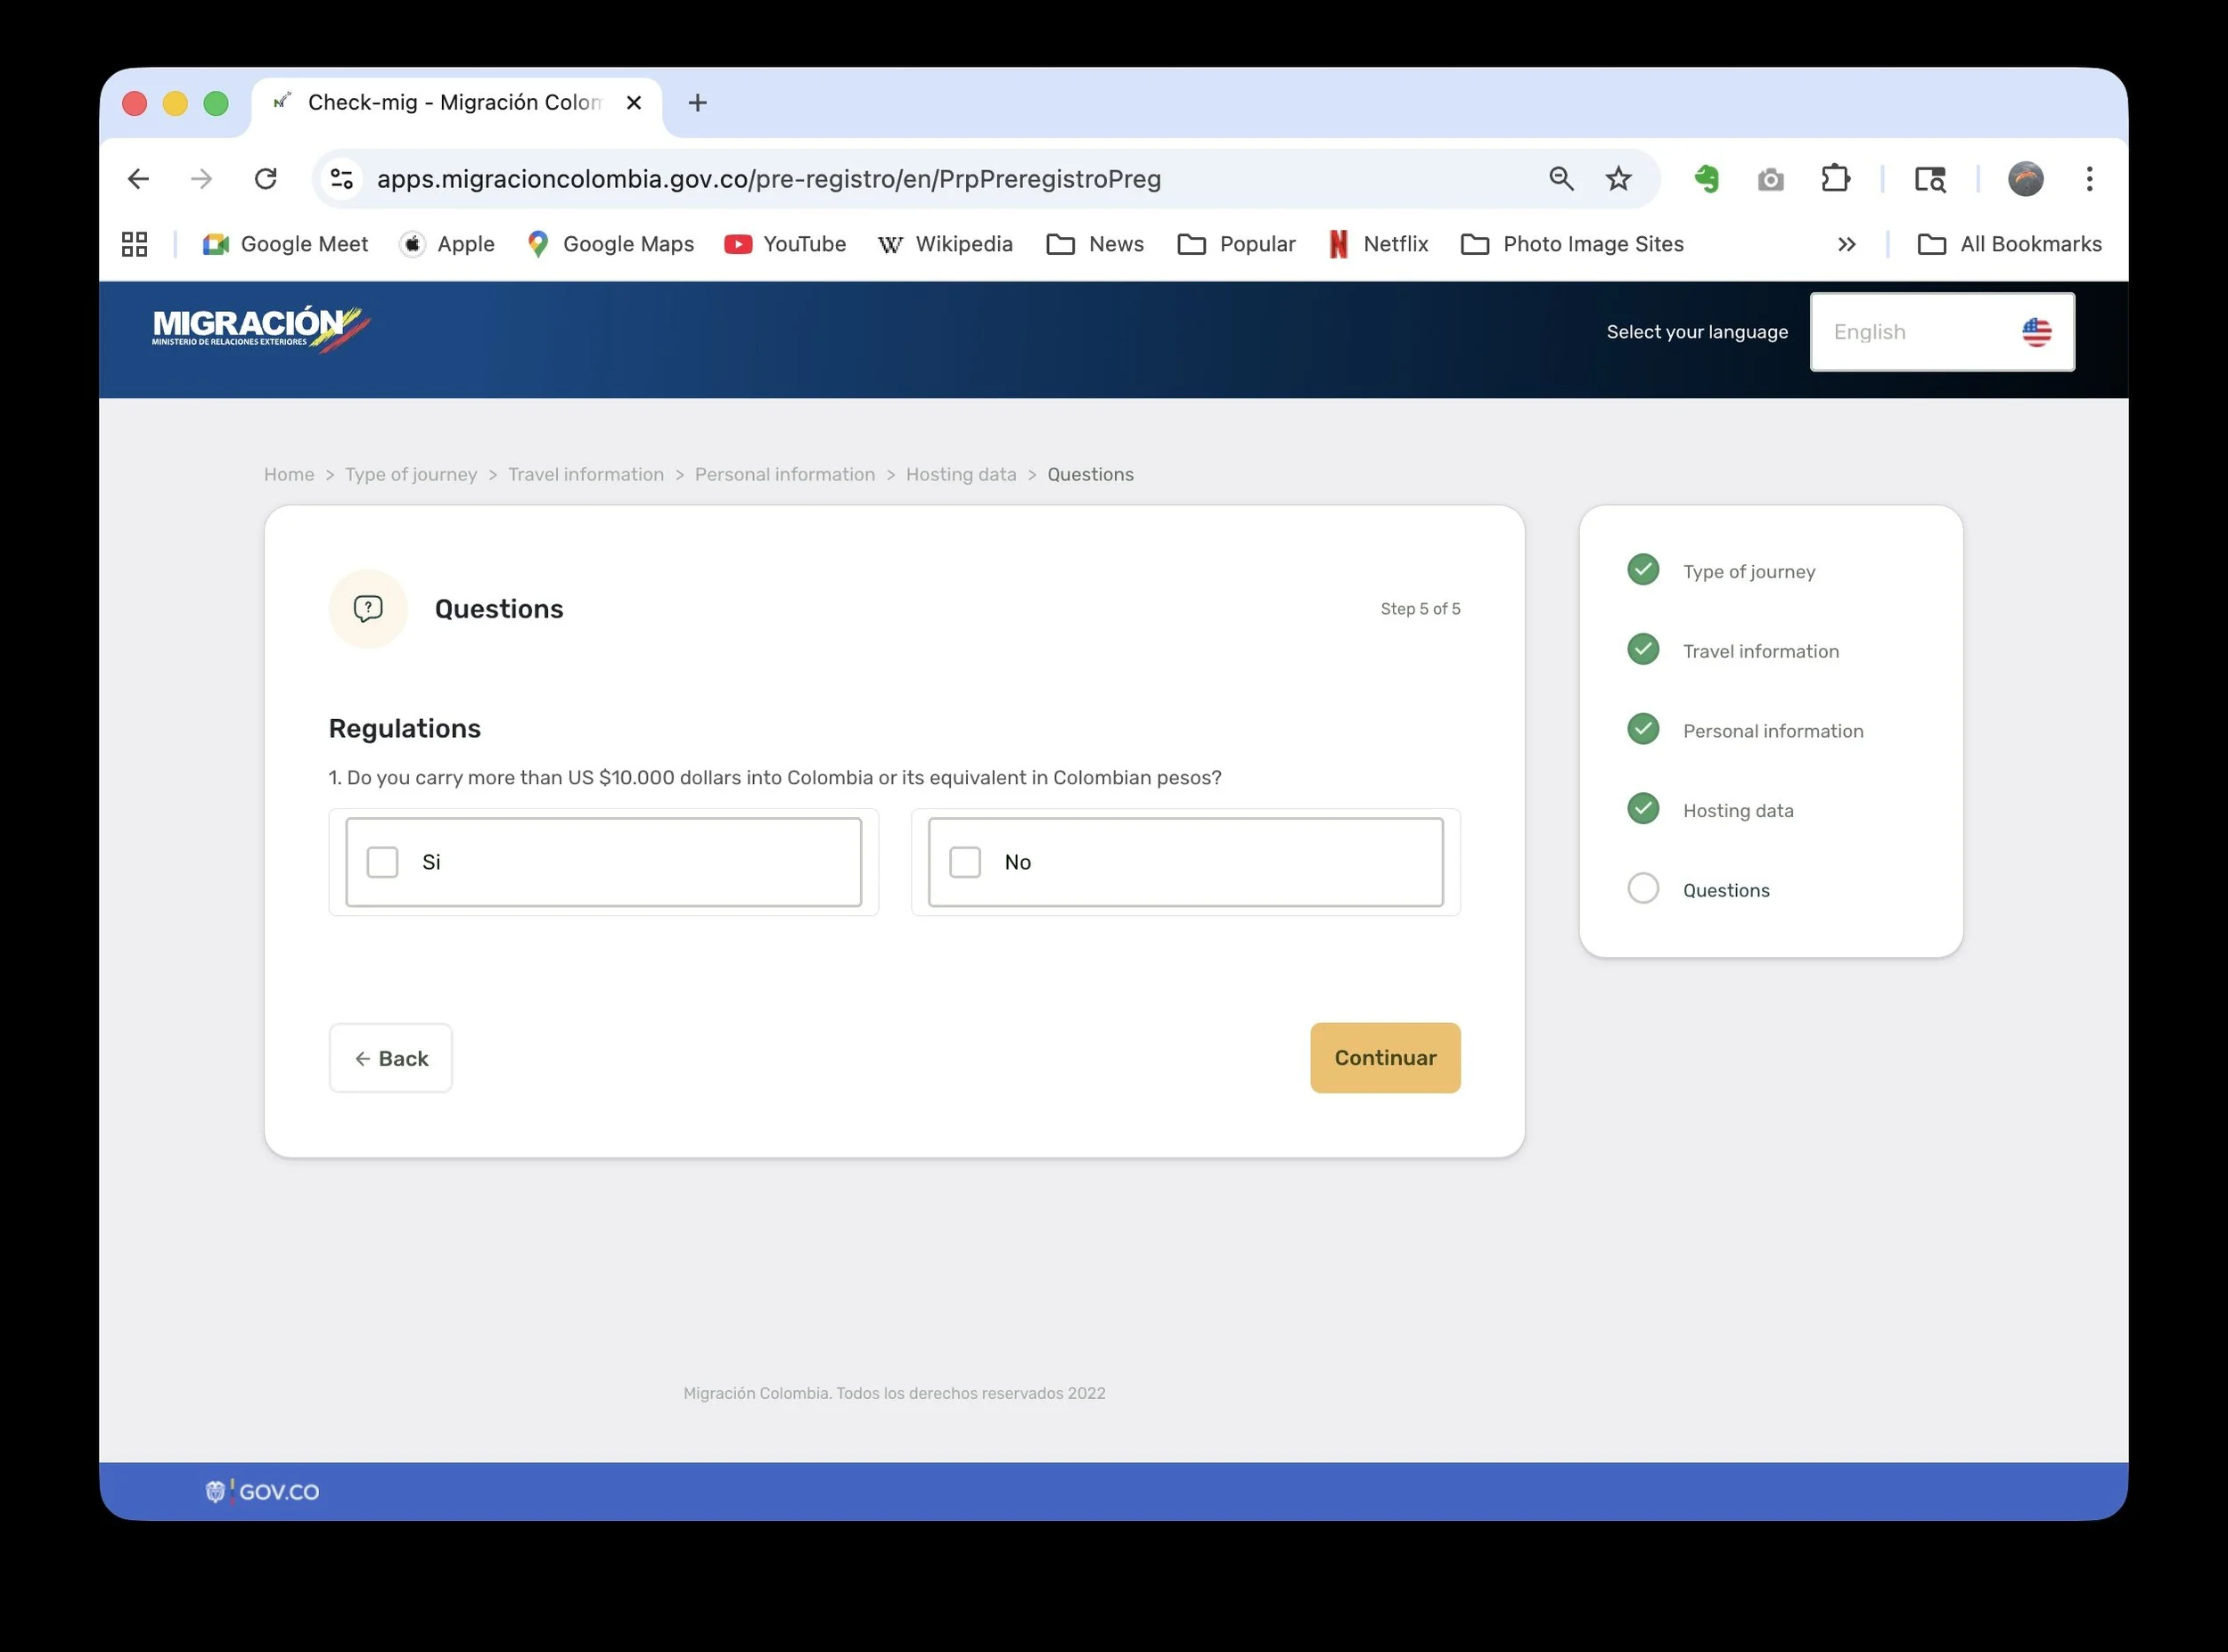
Step 5 – Immigration questions
Next you’ll see a series of yes/no immigration questions. At different times the number of questions has varied. At this time the only questions relates to how much cash you are carrying. As we discussed, as long as you are bringing less than USD $10,000, there is no issue – answer “No” to questions about carrying large amounts of cash or declaring more than that limit.
Answer the questions honestly based on your situation.
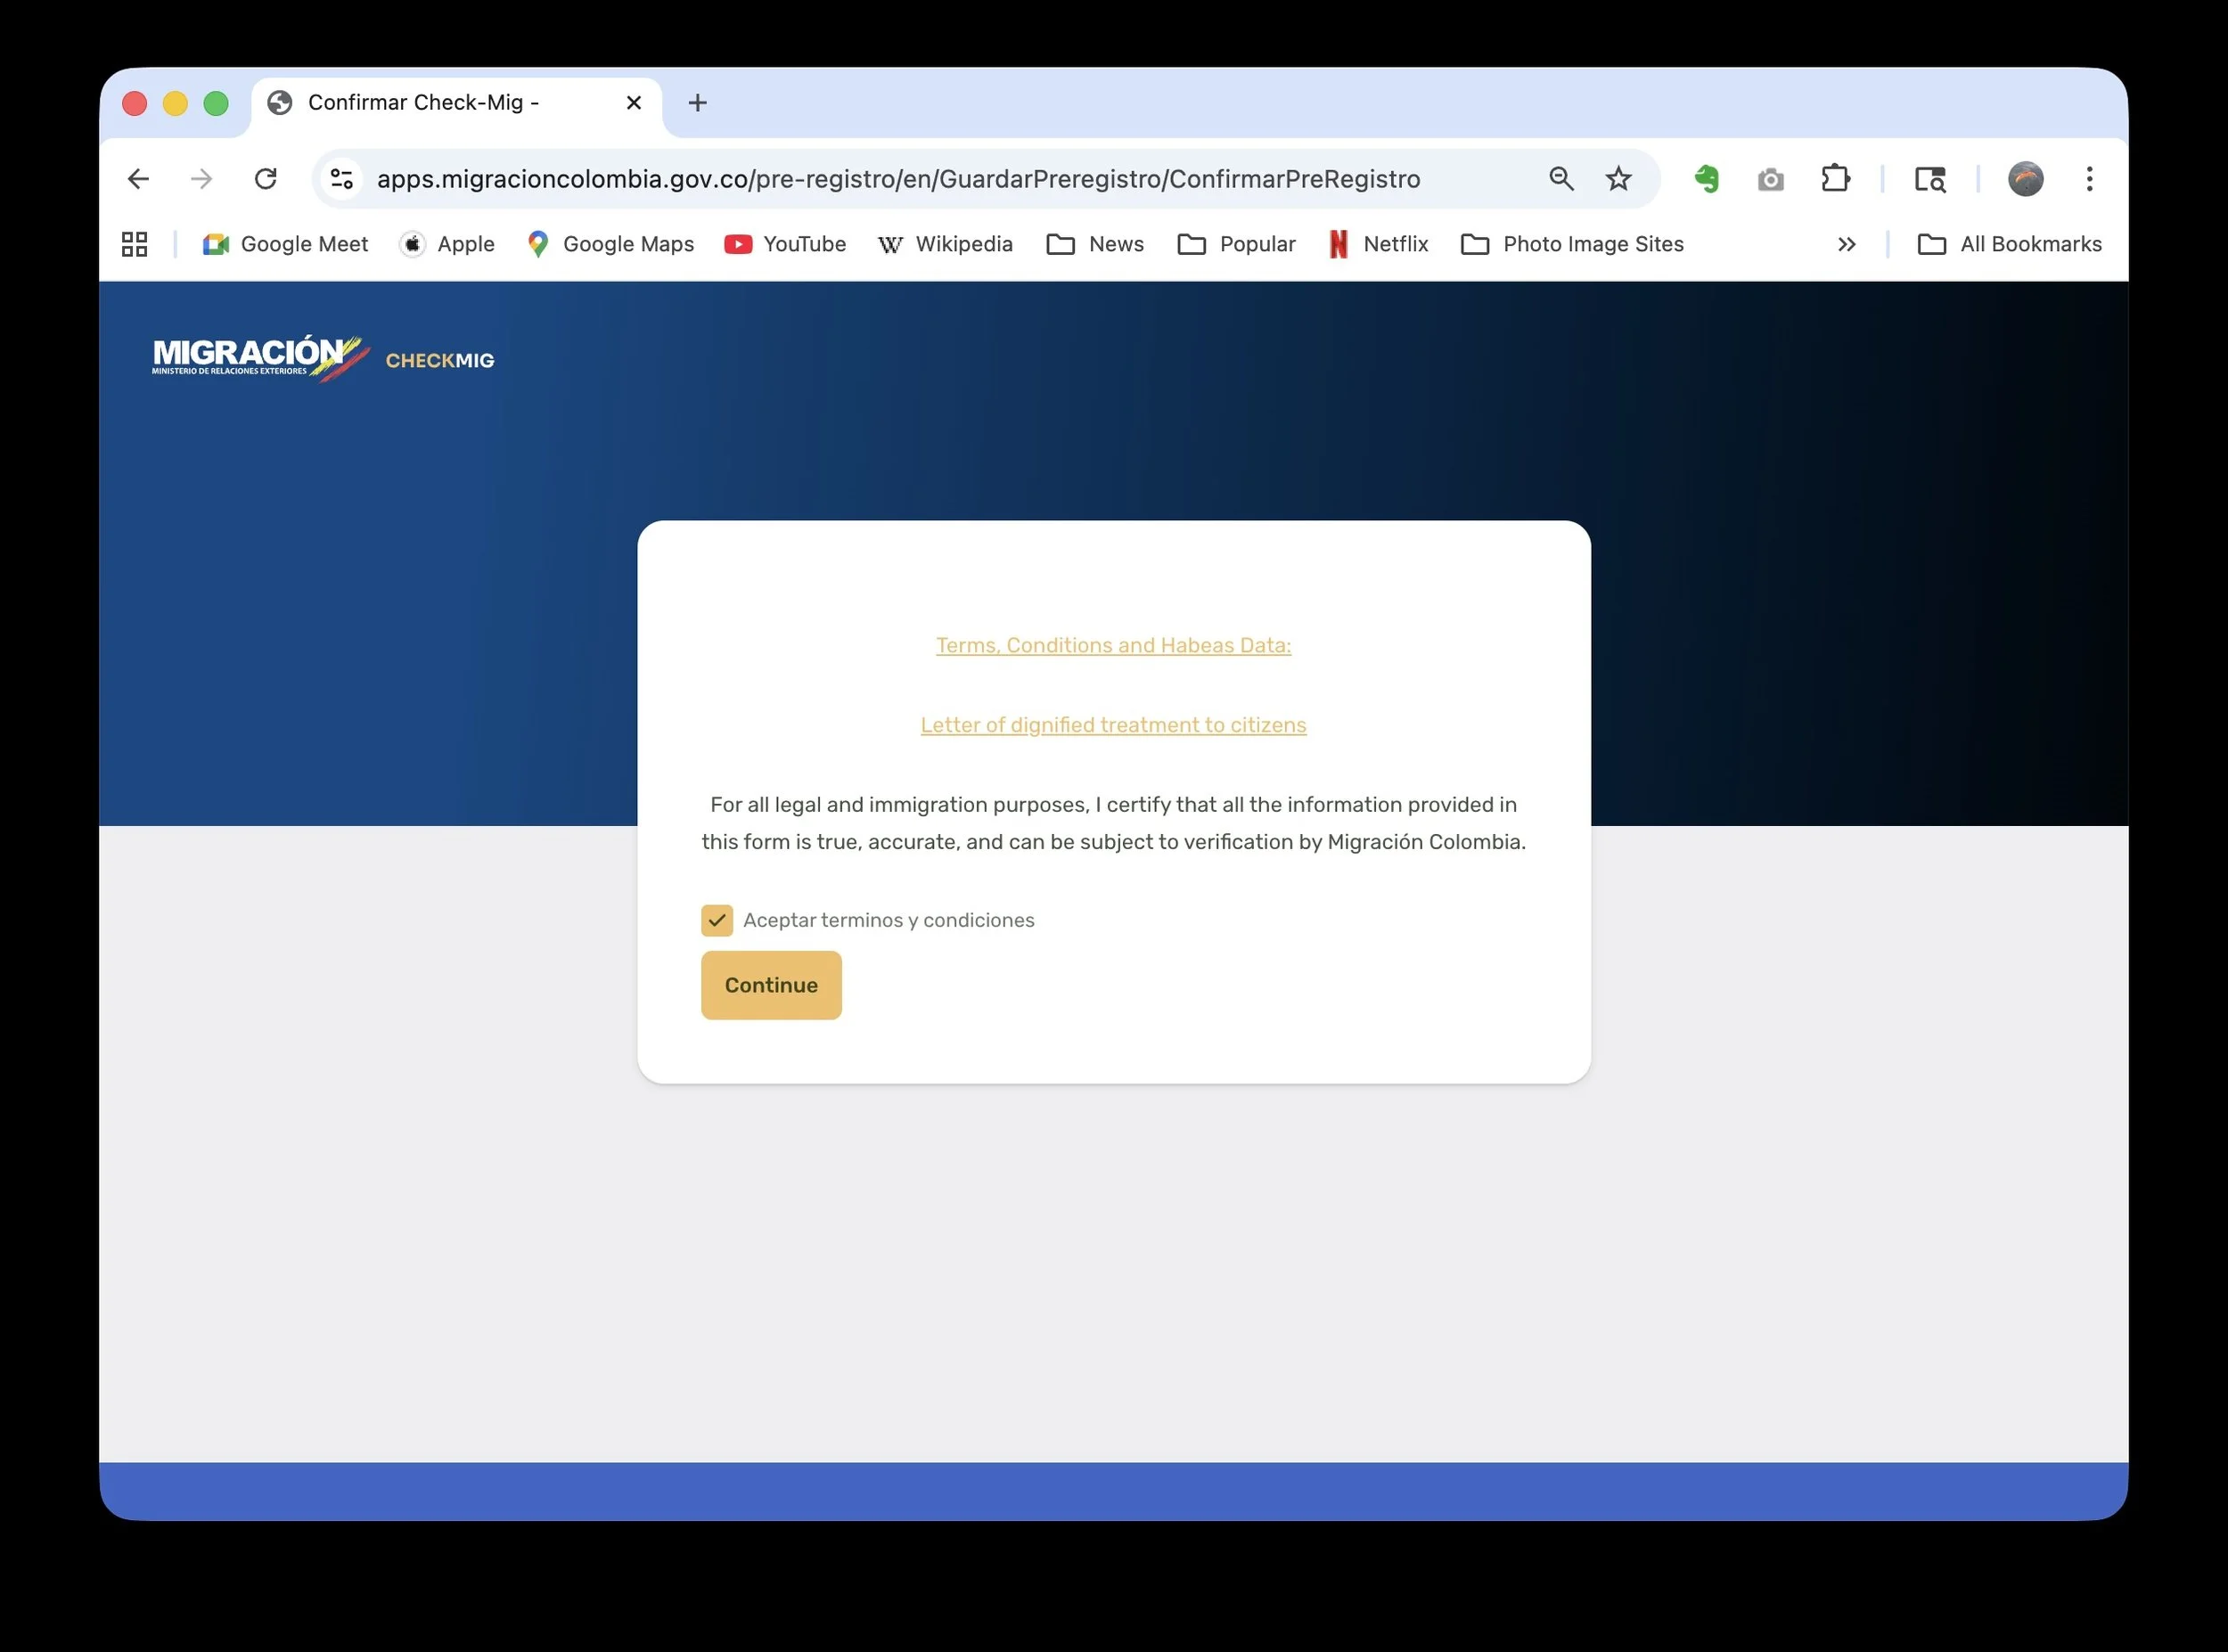
Step 6 – Terms and agreements
You’ll then see a Terms and Agreements page.
Review the text
Accept the terms by checking the box or clicking the appropriate button
Continue to the final step
This is standard and should look like the example screenshot
Step 7 – Confirmation & PDF download
After submitting, you’ll see a confirmation page.
Look for the Download button.
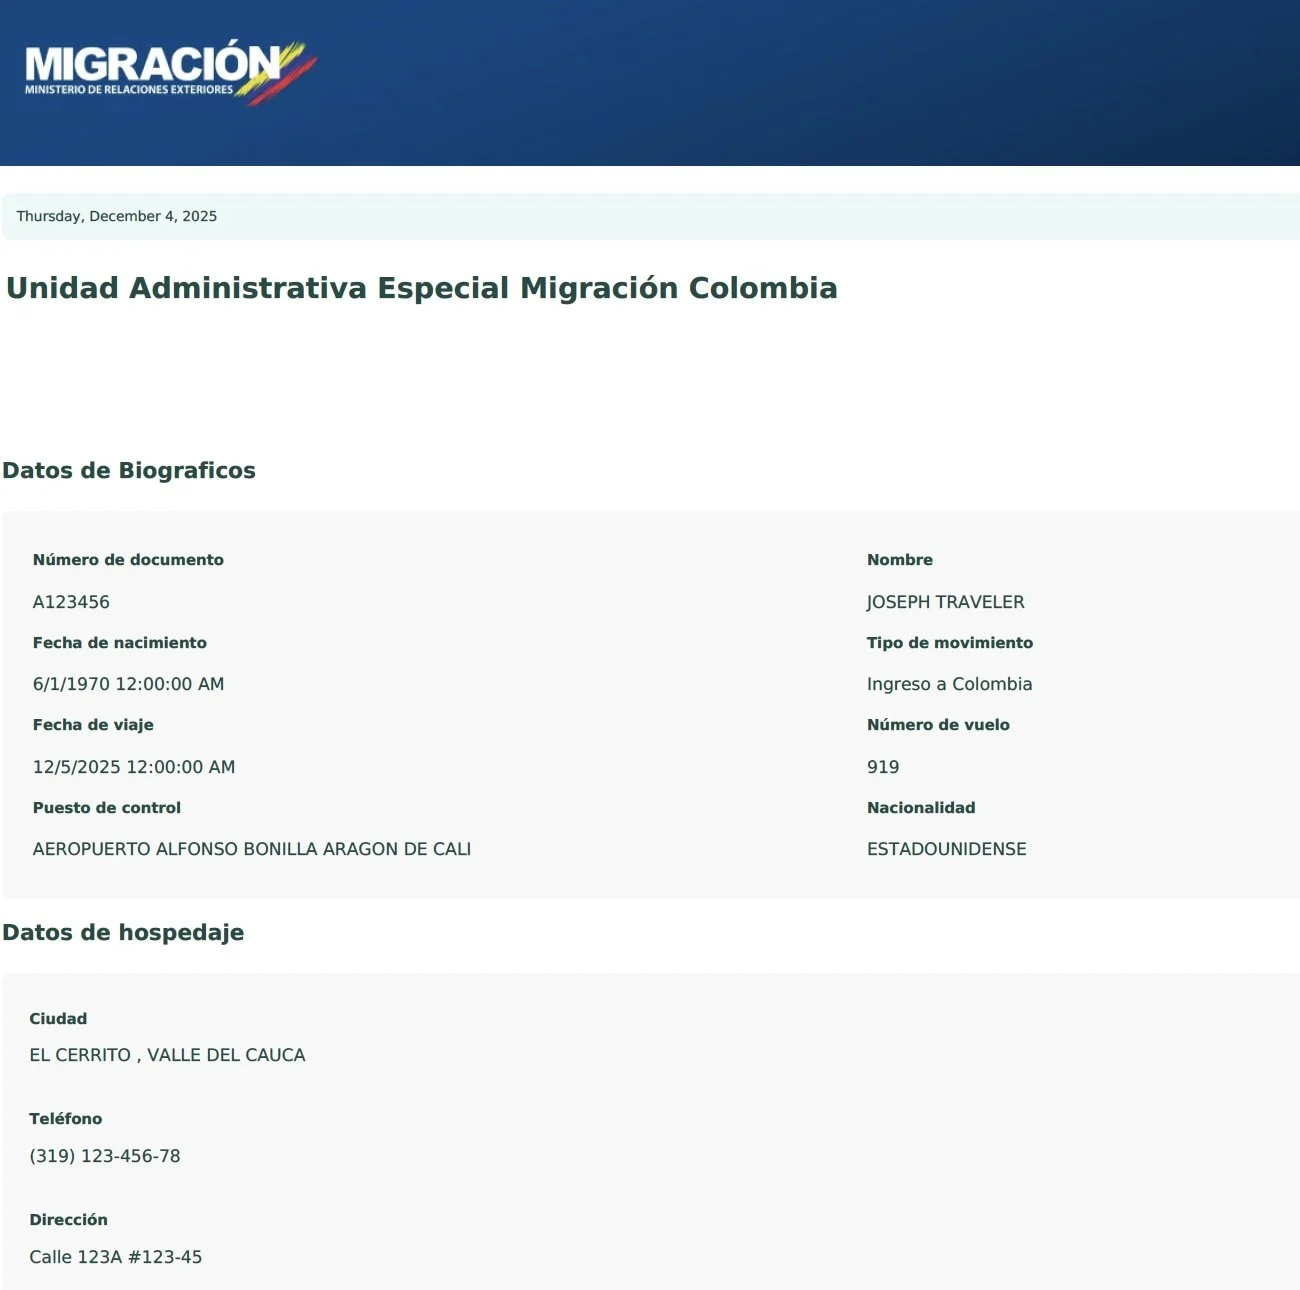
Click it to download a PDF copy of your Check-Mig registration.
The file will be saved to your Downloads folder.
The PDF will look similar to the sample we’ve shown.
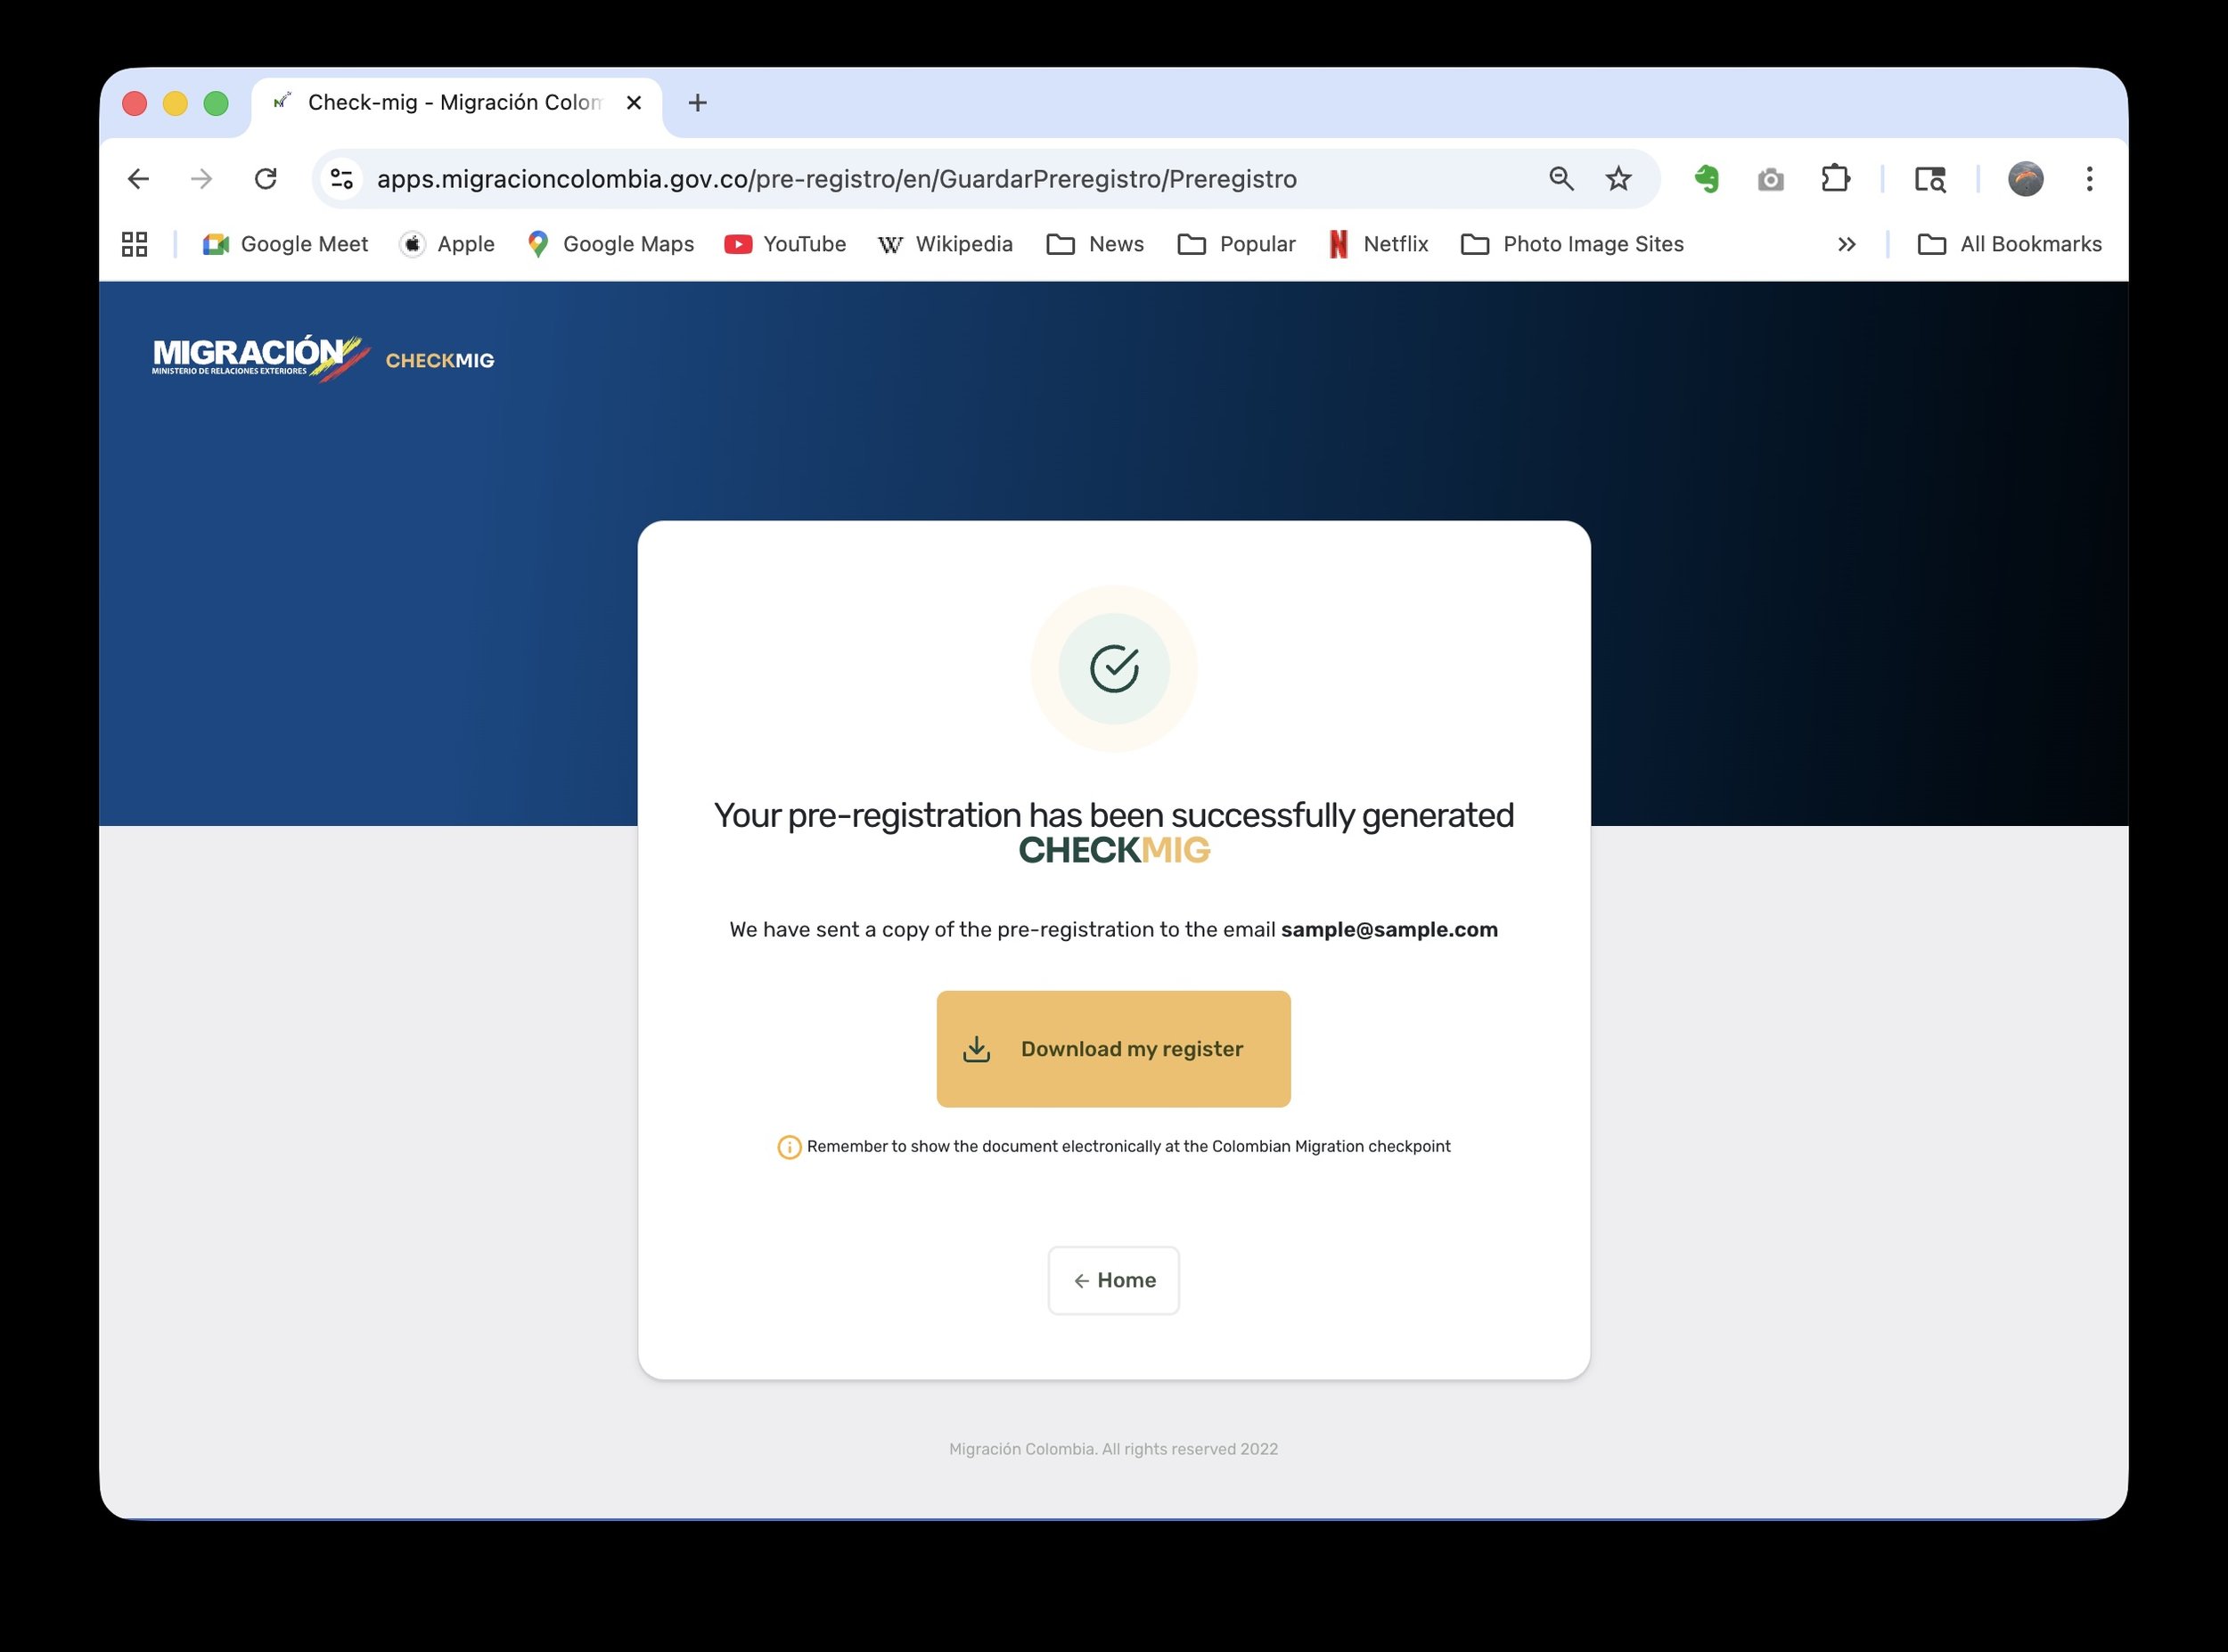
Strong recommendation:
Print a paper copy and keep it with your passport.
Save a copy on your phone (Files app, email, or screenshots).Immigration or airline staff may ask for it at various points in your journey.
If you get stuck
If the form freezes, errors, or doesn’t behave as expected:
Try refreshing the page and starting again.
Use a laptop or desktop browser if possible (Chrome or Edge tend to work best).
If you still have issues, take a screenshot and message us – we’ll help you through it.